Carolyn Jarvis Staff Blog
![]()
Molbak’s Garden + Home – A hidden Seattle treasure
March 23, 2016
Over spring break, I didn’t do one bit of house work. In fact, I left the state and went to Seattle in order to ensure I couldn’t. While in Seattle I was overcome oasis of fresh, colorful blooms. It’s already springtime in Seattle, tulips and cherry blossoms have flowered. It was a stark difference to Denver where the trees are still bare and the weather is annoyingly temperamental. After seeing how excited I was about the blossoms, my Aunt told me about this awesome nursery a town over and asked if I was interested in going. I said, “of course!” and we headed over the next day.
The nursery is called Molbak’s and let me tell you, it was the best nursery I’d ever been to. The plants are mostly all in an adorable covered greenhouse, but they have a regular building that you first walk into filled with seeds and some of the cutest home goods I’ve ever seen. At first, the home goods they had seemed way overpriced, but a quick search on amazon showed that they were actually the correct retail price. So, that was a pleasant surprise. I still wasn’t able to afford everything I wanted but less sad about it. They had everything, from designer bags and shoes to elegant pots. It was the perfect place to find little trinkets to take home to my friends.
I also wish I could have taken home some of the plants, but I wasn’t sure how TSA would feel about succulents peeping out of my bags and decided just to take a thousand pictures instead. They had every flower I could ever dream of seeing. I think I discovered more flowers there than ever did at the Denver Botanical Garden. They not only had hundreds of worldwide popular flowers, but also local native plants, which was a nice touch. The prices were varied. While some seemed overpriced, others seemed like a bargain. Also, the quality of the plants was great. I could tell they had been well-loved before they made their way to the store.
Molbak’s also has a charming little café area where patrons can sit and have a coffee and sandwich. Unfortunately, when we decided to get a latte, the power went out and the generator didn’t turn on in the café. Fortunately, though, the staff was still willing and able to make us a pour over in the style of a latte. It was some of the best coffee I’d ever had, but then again it’s hard to find a bad cup of coffee in the Seattle area.
Overall, my experience at Molbak’s was extremely positive and I hope to one day be able to go back. I would definitely recommend it to anyone visiting or moving to the Seattle area. The store has inspired me to visit more local Denver nurseries after the snowy bits of Spring here pass.
 How to refinish a plaster wall like a champ
February 24, 2016
You wouldn’t settle for less than you deserve, right? Well, don’t settle when it comes to your home’s walls either! Almost a hundred years of paint ruined the surface of my home’s plaster walls. But luckily, one of my father’s specialties as a construction guru (and the Tom Silva to my Bob Vila) has always been wall resurfacing. With just a few tools, some mud, and a lot of muscle, we were able to resurface most of the walls in the house. Here’s how –
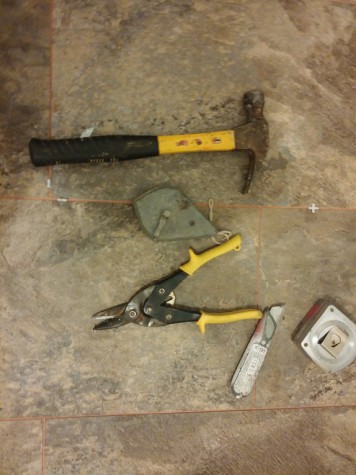
Tools you’ll need:
Mud pan
Hand sander
Extra sandpaper
Drywall mud (it’s literally mud you pay for)
Paint Roller
Paint brush
Taping knives
- Move any furniture you remotely care about out of the room you’re working on and drop those drop cloths in a Snoop Dog fashion, like they’re hot. Remove anything hanging as well as switch outlet covers from the walls.
- Sand textured walls using an electric sander and medium-grit sandpaper to the best of your abilities. The sandpaper will get caked up with dust often so make sure you have plenty to replace on hand. Make sure to focus on the chunky areas. This step can be omitted if the walls are lightly textured or smooth (lucky).
- Wipe your walls down with a clean, damp cloth in order to remove excess sanding dust. Vacuum the sanding dust from the baseboards and floor.
- Mask any fancy molding or baseboards you may have using wide painter’s tape. Place tape over electrical outlets and light switches.
- Fill your mud tray with the drywall mud. Apply a thin, skim coat of fast-drying drywall mud to the wall using a taping knife. Make sure to wipe mud from the corner edges of the knife after each scoop to prevent drag marks. Lay the mud on the wall using smooth, even strokes and use the taping knife to spread the mud evenly. Make sure that all strokes are flowing in the same direction. Lay and spread the mud until the walls are completely covered. Allow the mud to dry completely for the amount of time recommended by the manufacturer.
- Sand the walls smooth using an electric sander with a fine-grit sandpaper (wax on wax off). Wipe the walls clean of sanding dust with a clean, damp cloth. Wipe off sand from the baseboard.
- Repeat Step 5 to apply a second skim coat of mud to the wall. Allow the walls to dry completely.
- Repeat Step 6 to smooth the walls and remove the sanding dust.
- Clean up dust, then apply a coat of primer to the walls with a paint roller and brush. After a second coat, the walls are ready to be painted with your preferred paint.
![]()
Grouted laminate floors made easy!
February 24, 2016
This past weekend my father and I decided to finally replace the gross 2nd bathroom floor. The floor had been warped from water damage and had layers upon layers of different laminate flooring. We decided to try our hands at grouted laminate flooring because of the look and durability. I also chose grouted laminate flooring because they’re very easy to clean, extremely affordable (around $150), and are somewhat easy to install.
Steps to installing the grouted laminate flooring:
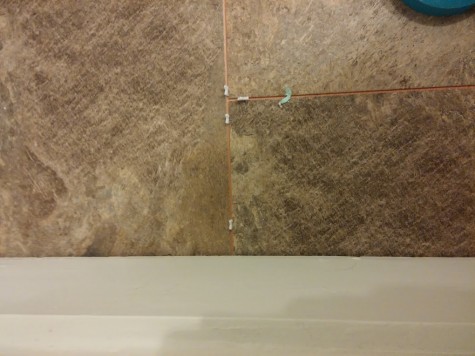
Putting down a Sub-floor-
1. Because the floor was uneven, I started by removing all of the old laminate flooring so that I could prep the surface for a new sub-floor. This is not fun and you’ll likely need to use a prise bar to get the job started.
2. Putting down a new sub-floor seems easy, but with an uneven floor like mine, it can be a little difficult. It is crucial to make sure that all cuts are double-checked multiple times before the final place. We used hardwood plywood from Lowes.
3. To avoid unevenness, you’ll want to ensure that the plywood is securely screwed down.
4. Caulk any cracks and corners, as well as around the screws, and then apply a coat of latex primer.
Laying and cutting the laminate tile-
1. I first began by doing a dry lay of how the floor would look. We decided on a brick layout, but many styles are achievable with laminate tile. (I decided to start in the corner, where the tile and wood meet, so you would see a full tile (not cut) at the transition. It is typical to start in the middle, but for such a small space, I decided to start at the wall.)
2. Once you’ve decided on a layout, start by peeling off part of the backing from the tile.
3. Lay it on the sub-floor in the designated spot.
4. Using spacers (I used 1/8″ spacers), start installing your next laminate floor tile.
5. Eventually, there will be a point where you’ll need to make some cuts to fit the laminate flooring. Unlike ceramic tile, cutting laminate tiles is fairly easy.
A. Using a pencil and ruler, determine where your cut is going to be and draw a line.
B. Score the laminate tile 2-3 times with a sharp construction blade or Sheetrock knife
C. After scoring the laminate tile, it should snap with ease and your straight cut piece will be ready to lay.
6. To ensure that the laminate tile adhered to the ground, I stomped all over the floor with my bare feet. You can also use a rolling pin, if you’re fancy.
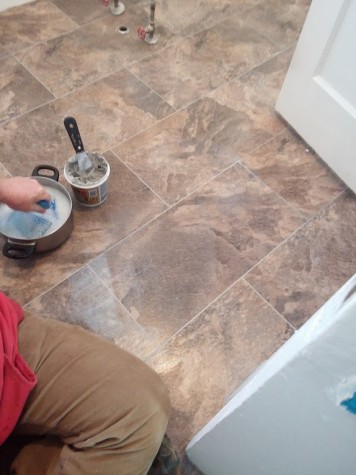
How to grout laminate tile-
1. Choose a grout specially made for laminate tile because they are made to be more flexible and adhesive.
2. Apply the grout. You can use a special grout bag, a Ziploc bag, or a glove to do this.
3. Immediately afterwards, using a sponge (one side with a sponge, the other side with abrasive), wipe the grout and dust away. You will need to continue wiping the haze away a few more times over the following 24 hours. Always start in the corner of your space, so you can work your way out of the room. And always work in small sections at a time.
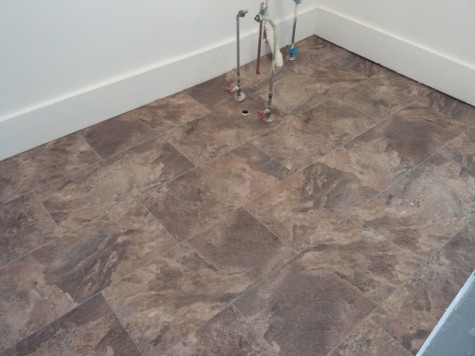
And then the grouted laminate floor is complete! Just like with ceramic tile, don’t walk on the surface for at least 24 hours so the grout has enough time to dry.